CCX Desktop
CCX Desktop is a local management client for end users. You can complete installation, key setup, service management, channel setup, and client integration from the desktop app.
Recommended user path:
Install → Configure key → Start service → Agent configuration → Add channels → Verify requests
Install
Download
Windows users are recommended to search for CCX Desktop in the Microsoft Store to install. The Store handles signing and auto updates.
macOS users can also install via Homebrew:
brew tap BenedictKing/ccx
brew install --cask ccx-desktop
If you are a developer or cannot use the Store / Homebrew, download the platform package from GitHub Releases:
| Platform | File name pattern |
|---|---|
| macOS (Apple Silicon) | CCX-Desktop-{version}-darwin-arm64.dmg |
| macOS (Intel) | CCX-Desktop-{version}-darwin-amd64.dmg |
| Windows (GitHub) | CCX-Desktop-{version}-windows-{arch}-setup.exe |
| Windows (Store/MSIX) | CCX-Desktop-{version}-windows-{arch}-store.msix |
| Linux | CCX-Desktop-{version}-linux-amd64.AppImage |
The *-store.msix package is mainly for Microsoft Store submission and verification. Public installs should prefer the Store. Direct sideloading of .msix may still require a trusted signing environment.
You can verify the download with the .sha256 file from the same release:
shasum -a 256 -c CCX-Desktop-*.sha256Installation steps
macOS
- Open the
.dmgfile. - Drag
CCX DesktopintoApplications. - Open
CCX DesktopfromApplications. The macOS build is signed with Apple Developer ID and notarized, so it should launch directly under normal conditions.
Windows
- Search for CCX Desktop in the Microsoft Store to install. Signing and updates are handled by the Store.
- If you use the GitHub installer, run the
-setup.exefile and follow the setup wizard. - If SmartScreen appears, choose More info → Run anyway.
Linux
chmod +x CCX-Desktop-*.AppImage
./CCX-Desktop-*.AppImage
AppImage supports in-app auto updates. If you install through deb or rpm packages, use your system package manager instead.
Configure key
When you open CCX Desktop, the first-run wizard generates and writes PROXY_ACCESS_KEY.
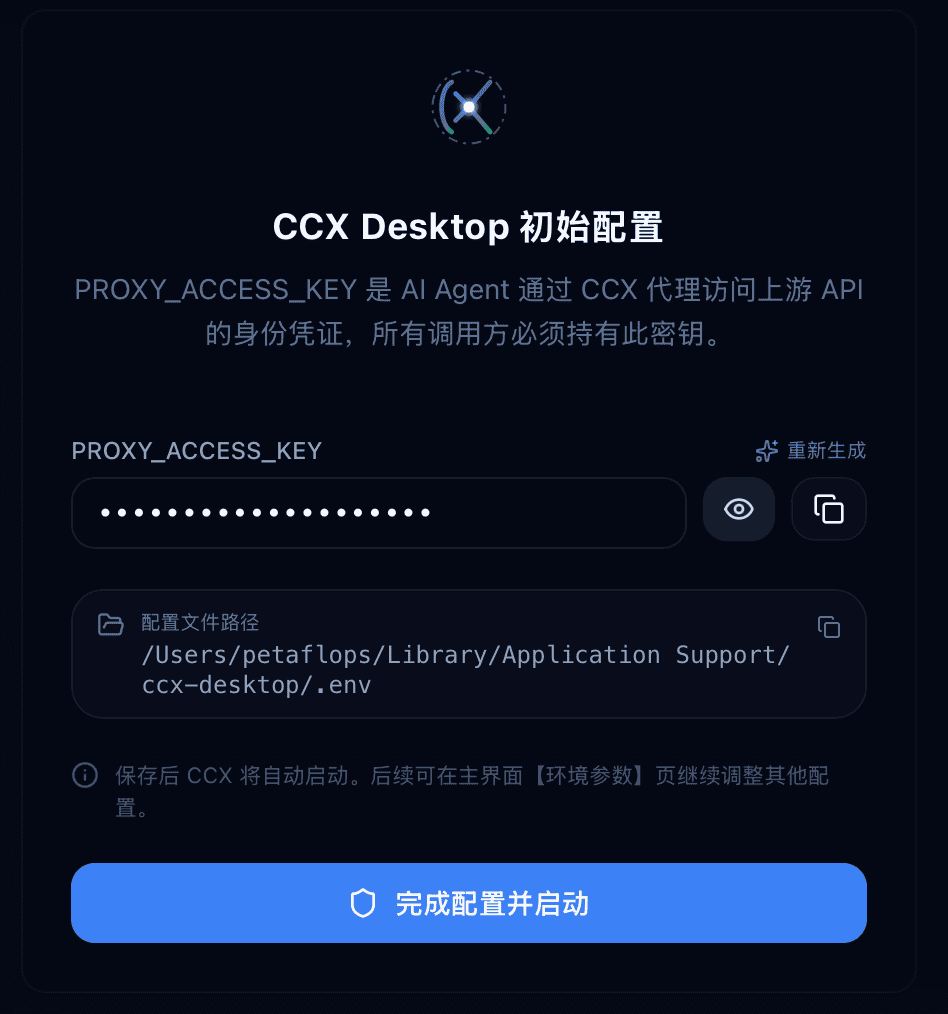
What PROXY_ACCESS_KEY is used for
- It is the proxy key clients use to access CCX.
- CCX Desktop writes it into client configuration when you apply agent settings.
- If you configure a client manually, set the client API key to the same
PROXY_ACCESS_KEY.
Key types to understand
| Key | Purpose |
|---|---|
PROXY_ACCESS_KEY | Client proxy key for accessing CCX |
ADMIN_ACCESS_KEY | Admin key used by the web UI and admin endpoints |
| Upstream API key | Provider key configured only inside CCX channels |
You can copy the current PROXY_ACCESS_KEY from the tray menu or Gateway Monitor, then paste it into the client configuration or shell environment.
Start service
Open Gateway Monitor and click Start service.
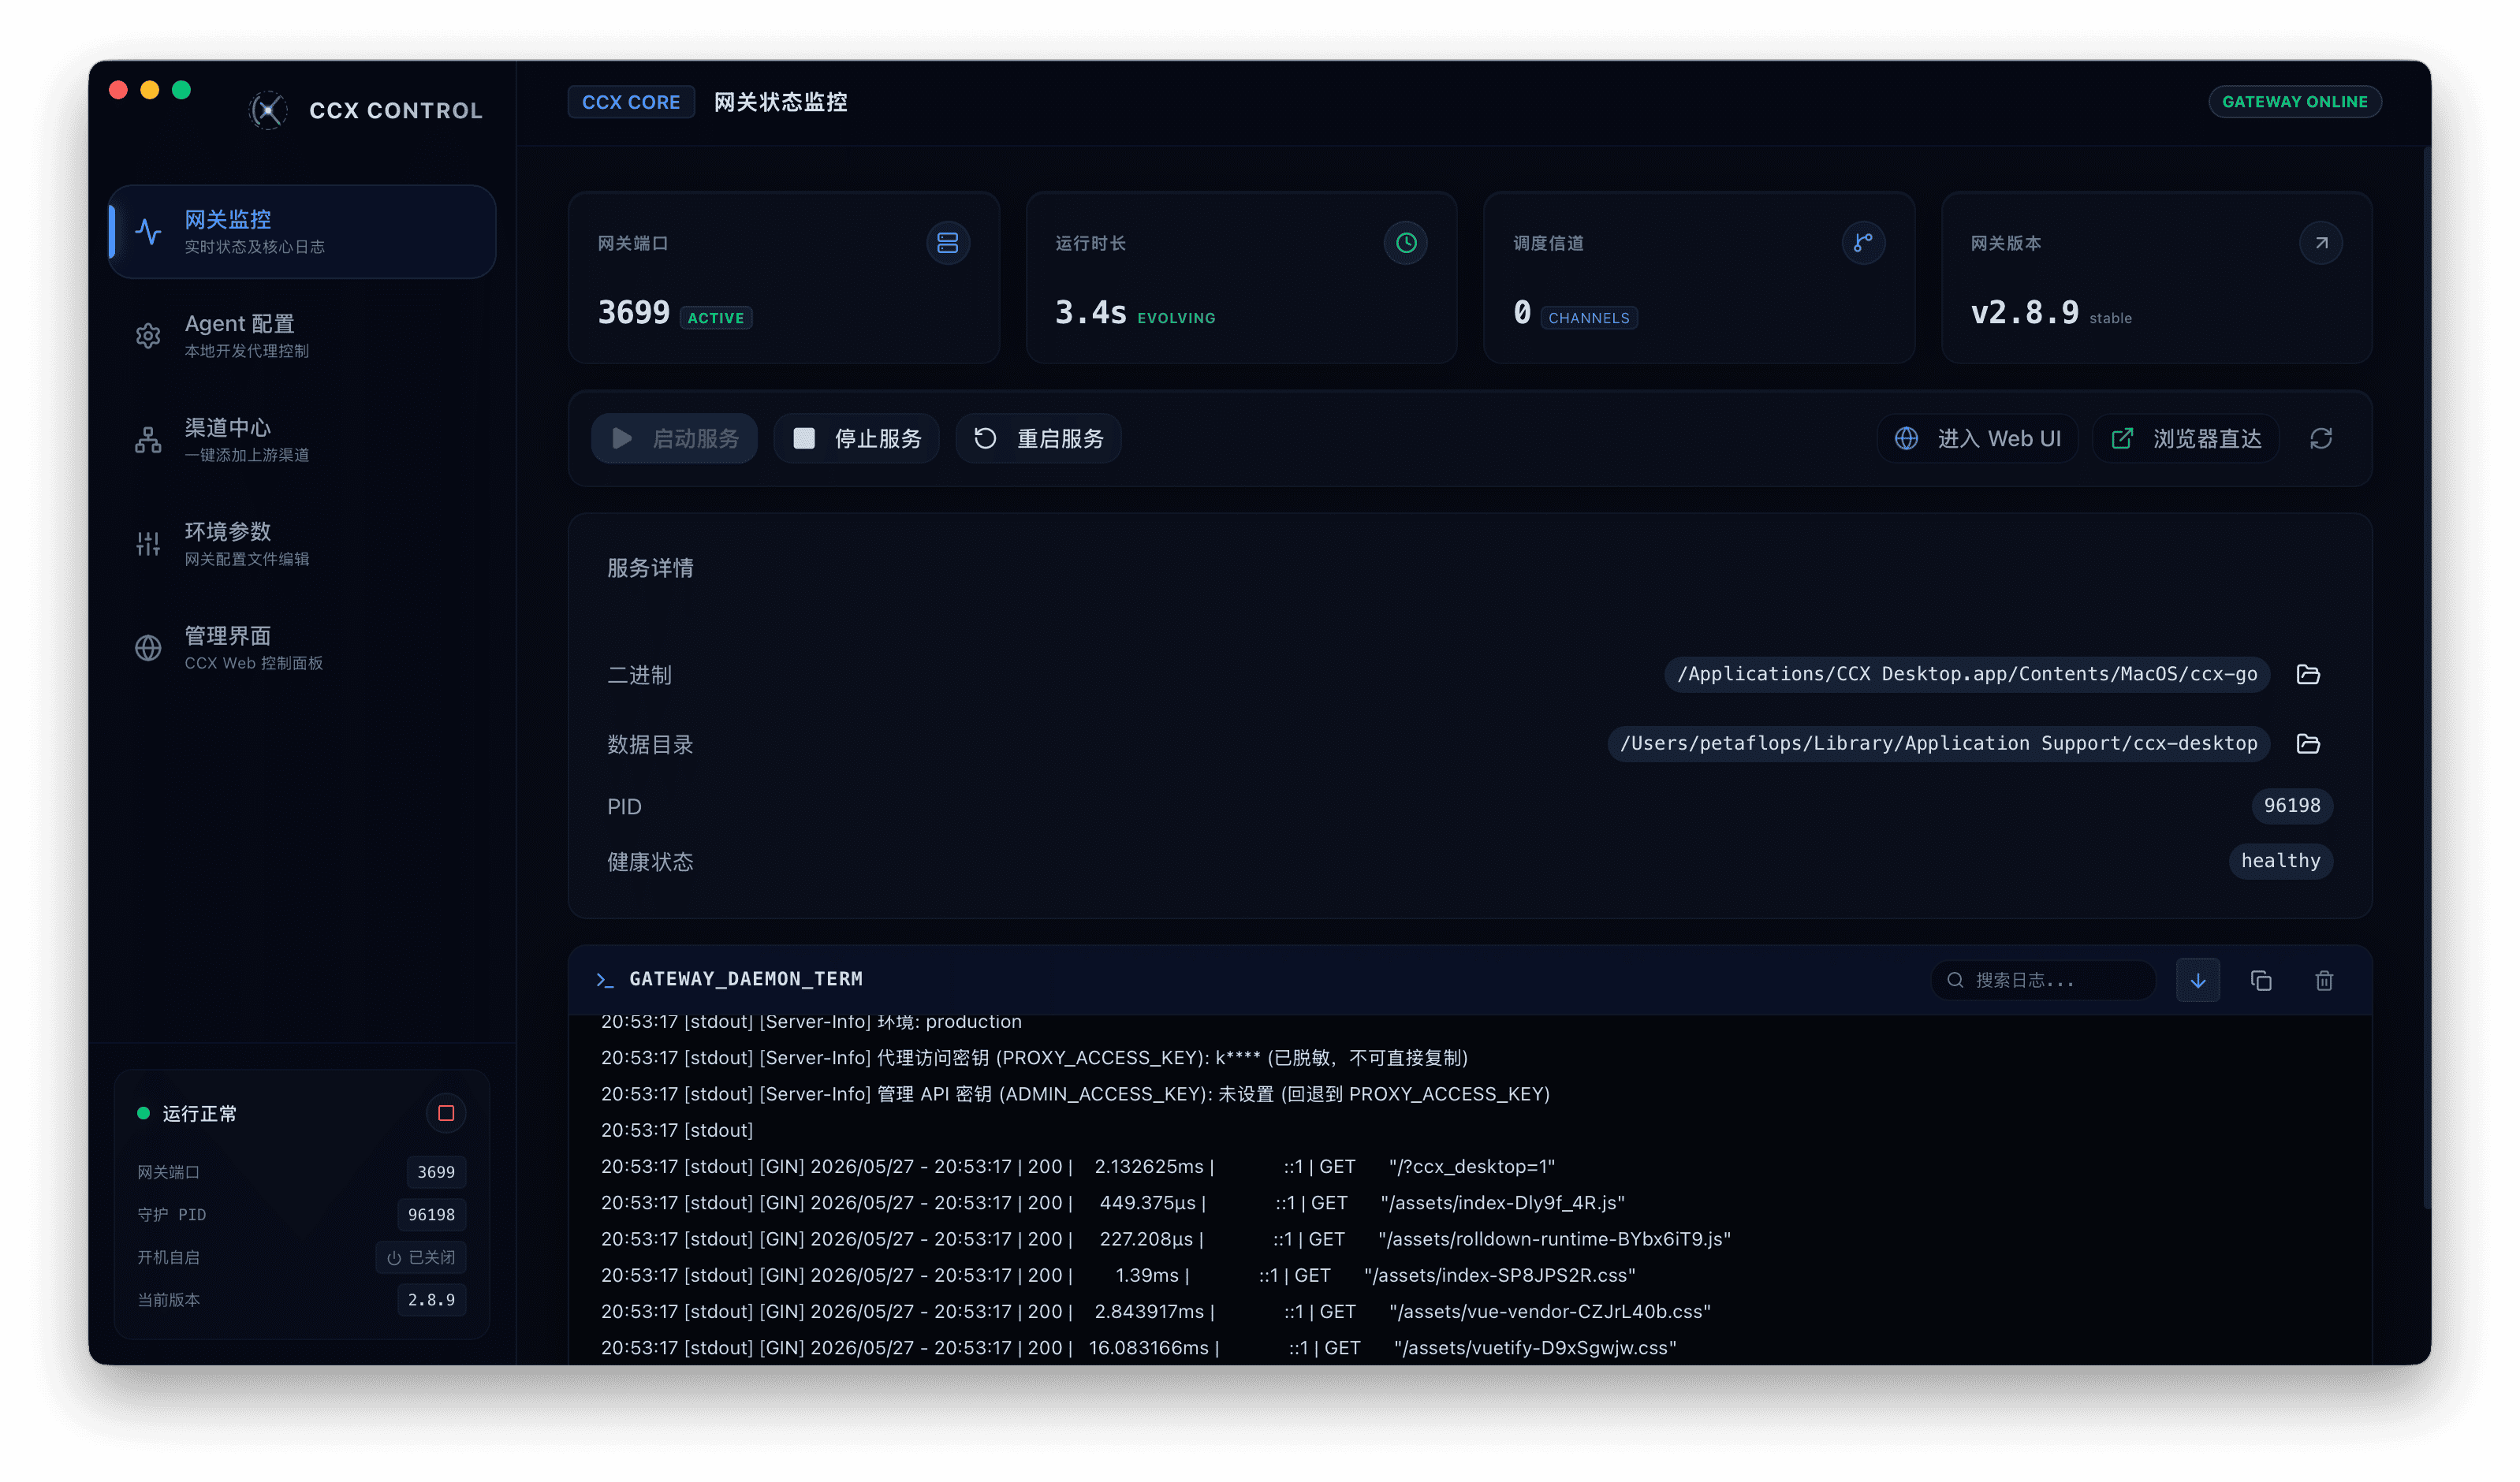
If CCX Desktop reports that the binary is missing, build the backend first:
cd backend-go && make buildAfter startup, check:
- The status indicator is green.
- The gateway port and uptime are visible.
- Log Viewer shows no obvious errors.
Gateway Monitor also supports:
- Stop / restart service.
- Live log output.
- Copying the web UI address.
Agent configuration
Open Agent Config to apply local CCX configuration to supported agent tools:
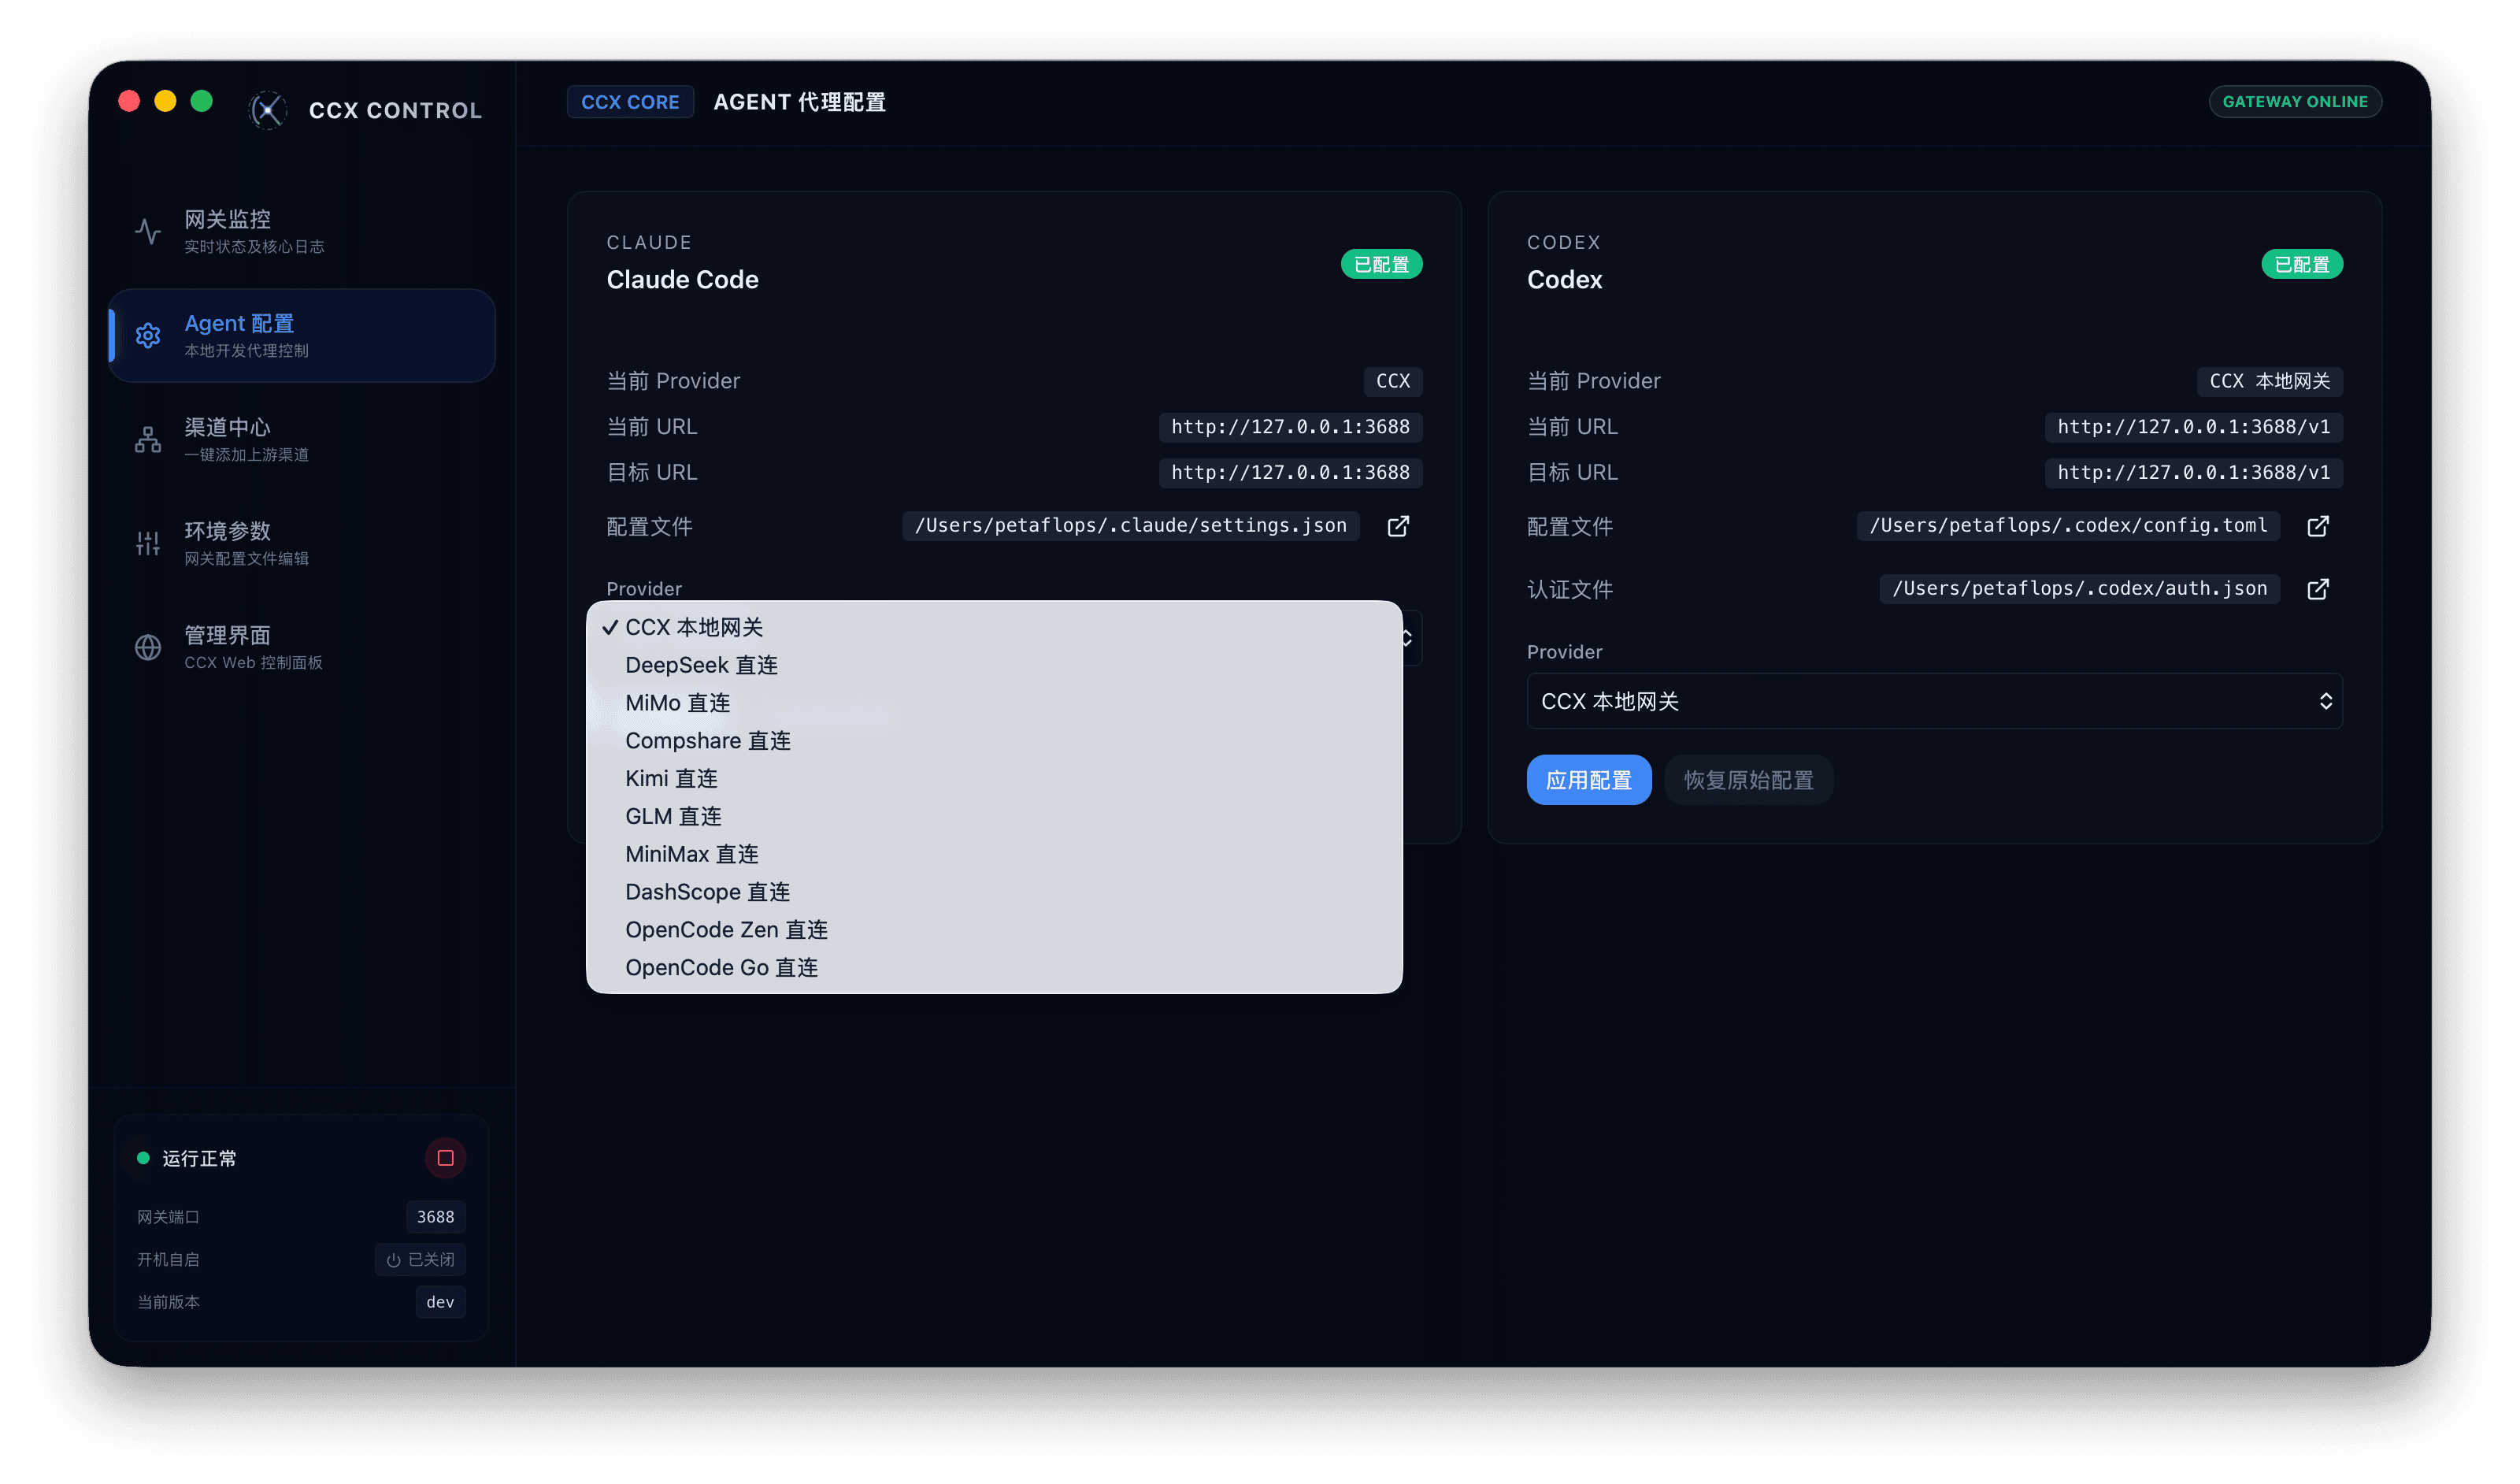
- Claude Code
- Codex
- OpenCode
Using CCX as the provider is recommended because requests go through the local gateway and can use channel scheduling and failover.
CCX Desktop typically writes:
- The CCX address the client should use.
- The proxy key (
PROXY_ACCESS_KEY). - Related model or provider settings.
After applying configuration, restart the matching client so the new settings take effect.
For protocol and Base URL details by client, see:
Add channels
Open Channel Center and add at least one working channel for the target endpoint:
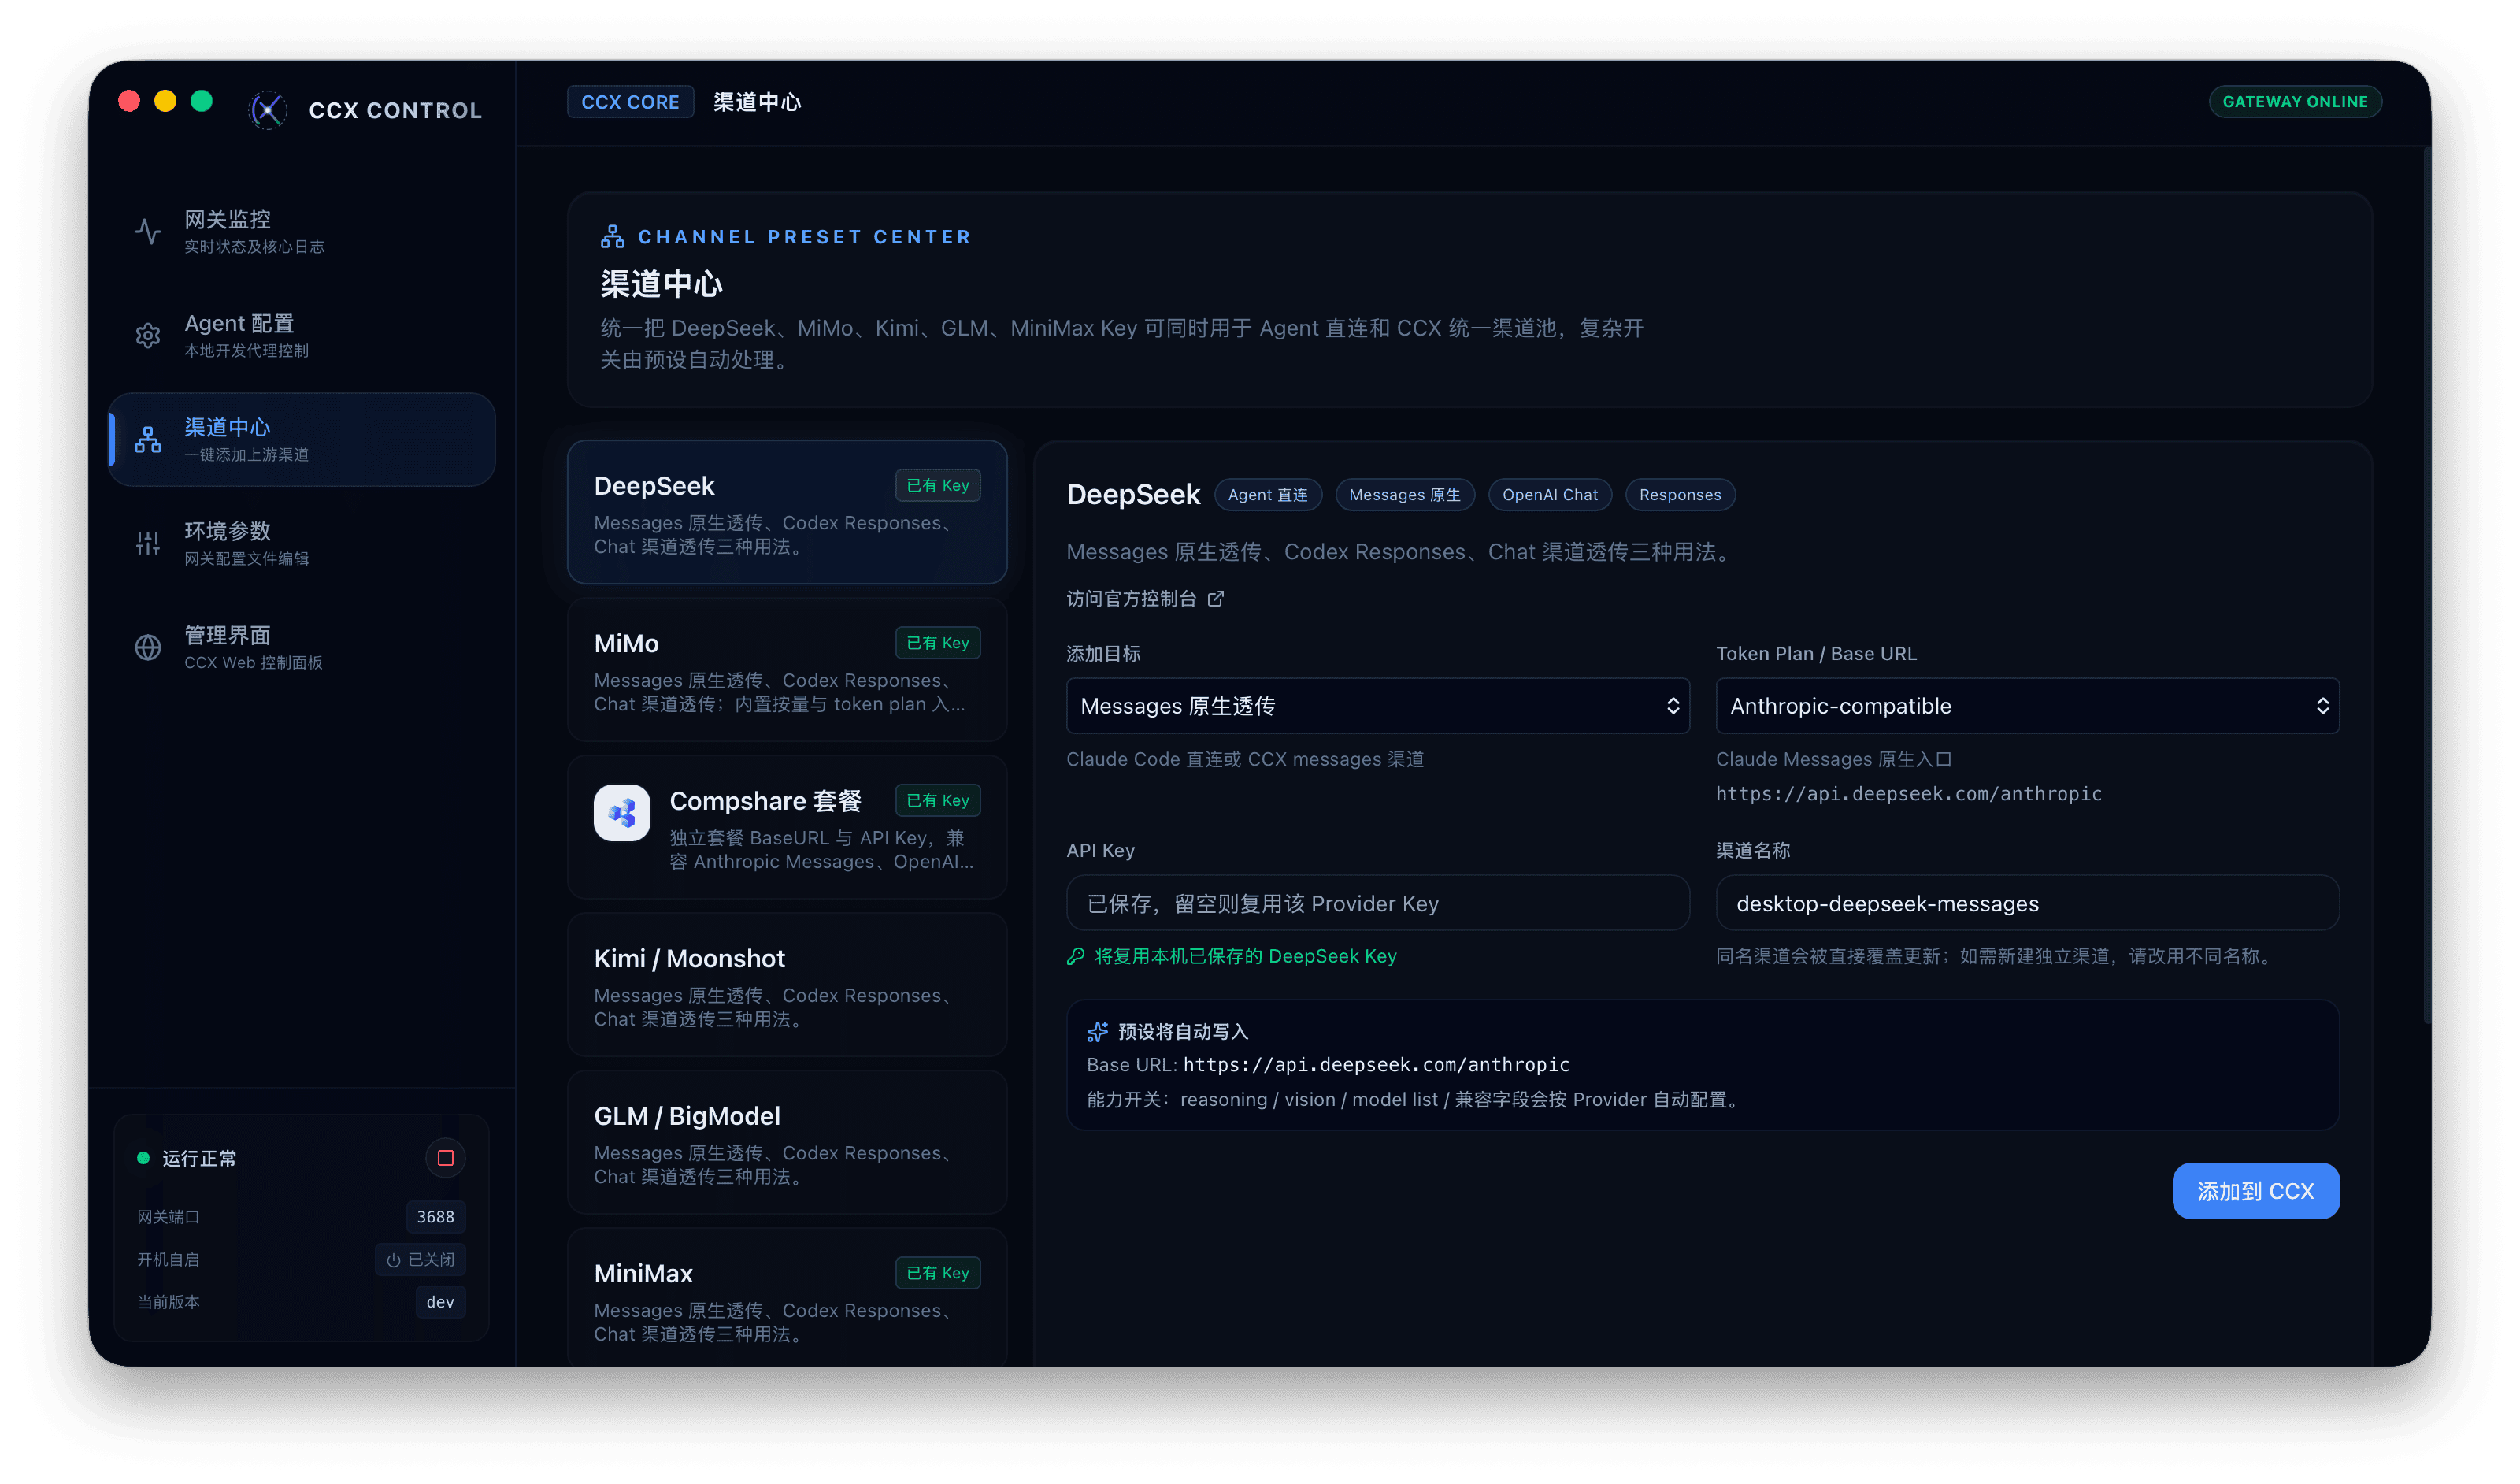
- Messages channel: for Claude Code
- Responses channel: for Codex CLI / Codex App
- Chat channel: for OpenCode
You can start from preset templates and then fill in:
- Upstream API key
- Base URL
- Model name or model mapping
- Compatibility options
TIP
The upstream API key is configured only in the channel. The client API key should be set to CCX PROXY_ACCESS_KEY.
After adding a channel, confirm that it is healthy in the web UI or logs.
Verify requests
After completing installation, key setup, service startup, agent configuration, and channel setup, verify the end-to-end path.
Verify with a client
- Start CCX Desktop and confirm the service is running.
- Restart the client (Claude Code / Codex / OpenCode).
- Send a test prompt such as
hello. - Confirm the request appears in the CCX Desktop Log Viewer or web UI.
Verify from the command line
You can first check the models endpoint:
curl http://localhost:3688/v1/models \
  -H "Authorization: Bearer your-ccx-proxy-key"
Then confirm the request path expected by each client:
- Claude Code requests should target
/v1/messages - Codex requests should target
/v1/responses - OpenCode requests should target
/v1/chat/completions
Environment configuration
Open Environment Params to edit the .env file. Common settings:
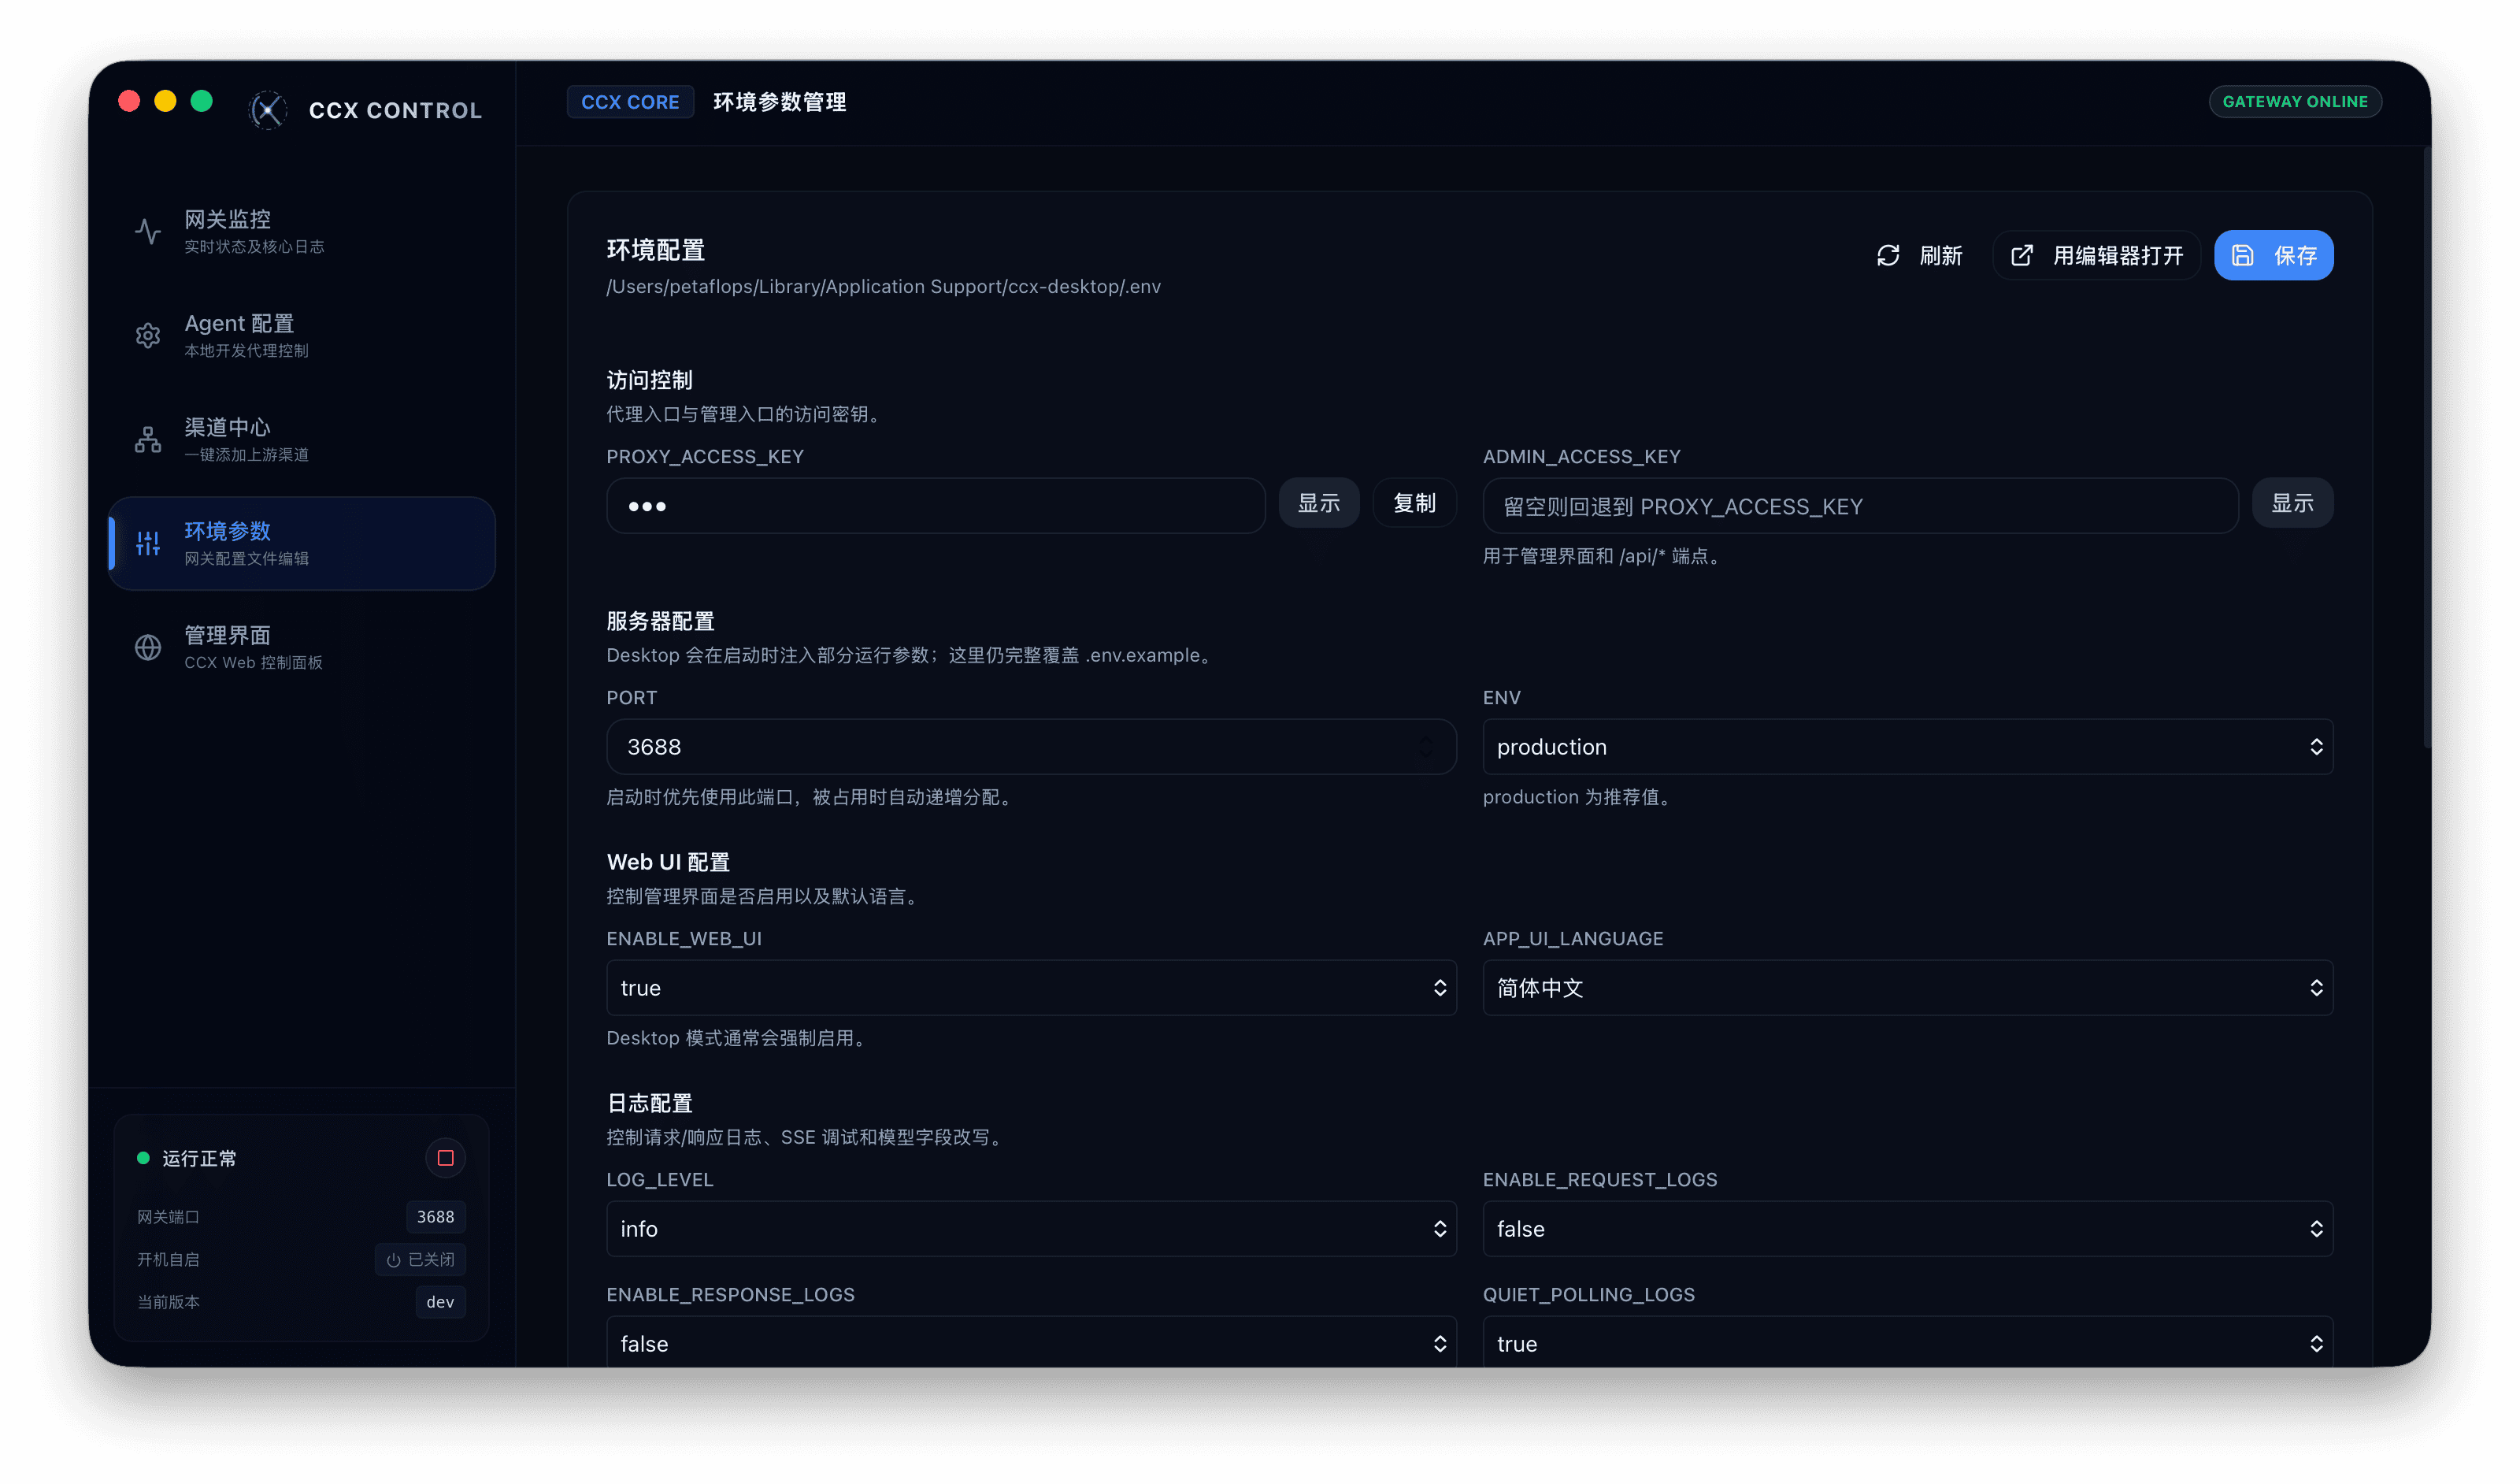
When installed as CCX Desktop, .env is stored in the CCX Desktop data directory, not in the source-tree backend-go/.env. You can find and open that directory from Data dir in Gateway Monitor. To enable local HTTPS for Claude Desktop, see Environment - Local HTTPS and use expanded absolute paths for TLS_CERT_FILE / TLS_KEY_FILE.
| Variable | Default | Description |
|---|---|---|
PORT | 3688 | Gateway port |
BIND_HOST | unset | Bind host; unset listens on all interfaces, 127.0.0.1 allows local-only access |
PROXY_ACCESS_KEY | - | Client proxy key for accessing CCX |
ADMIN_ACCESS_KEY | - | Admin key |
LOG_LEVEL | info | Log level |
After changing .env, restart the service to apply changes.
Web UI and system tray
Web UI
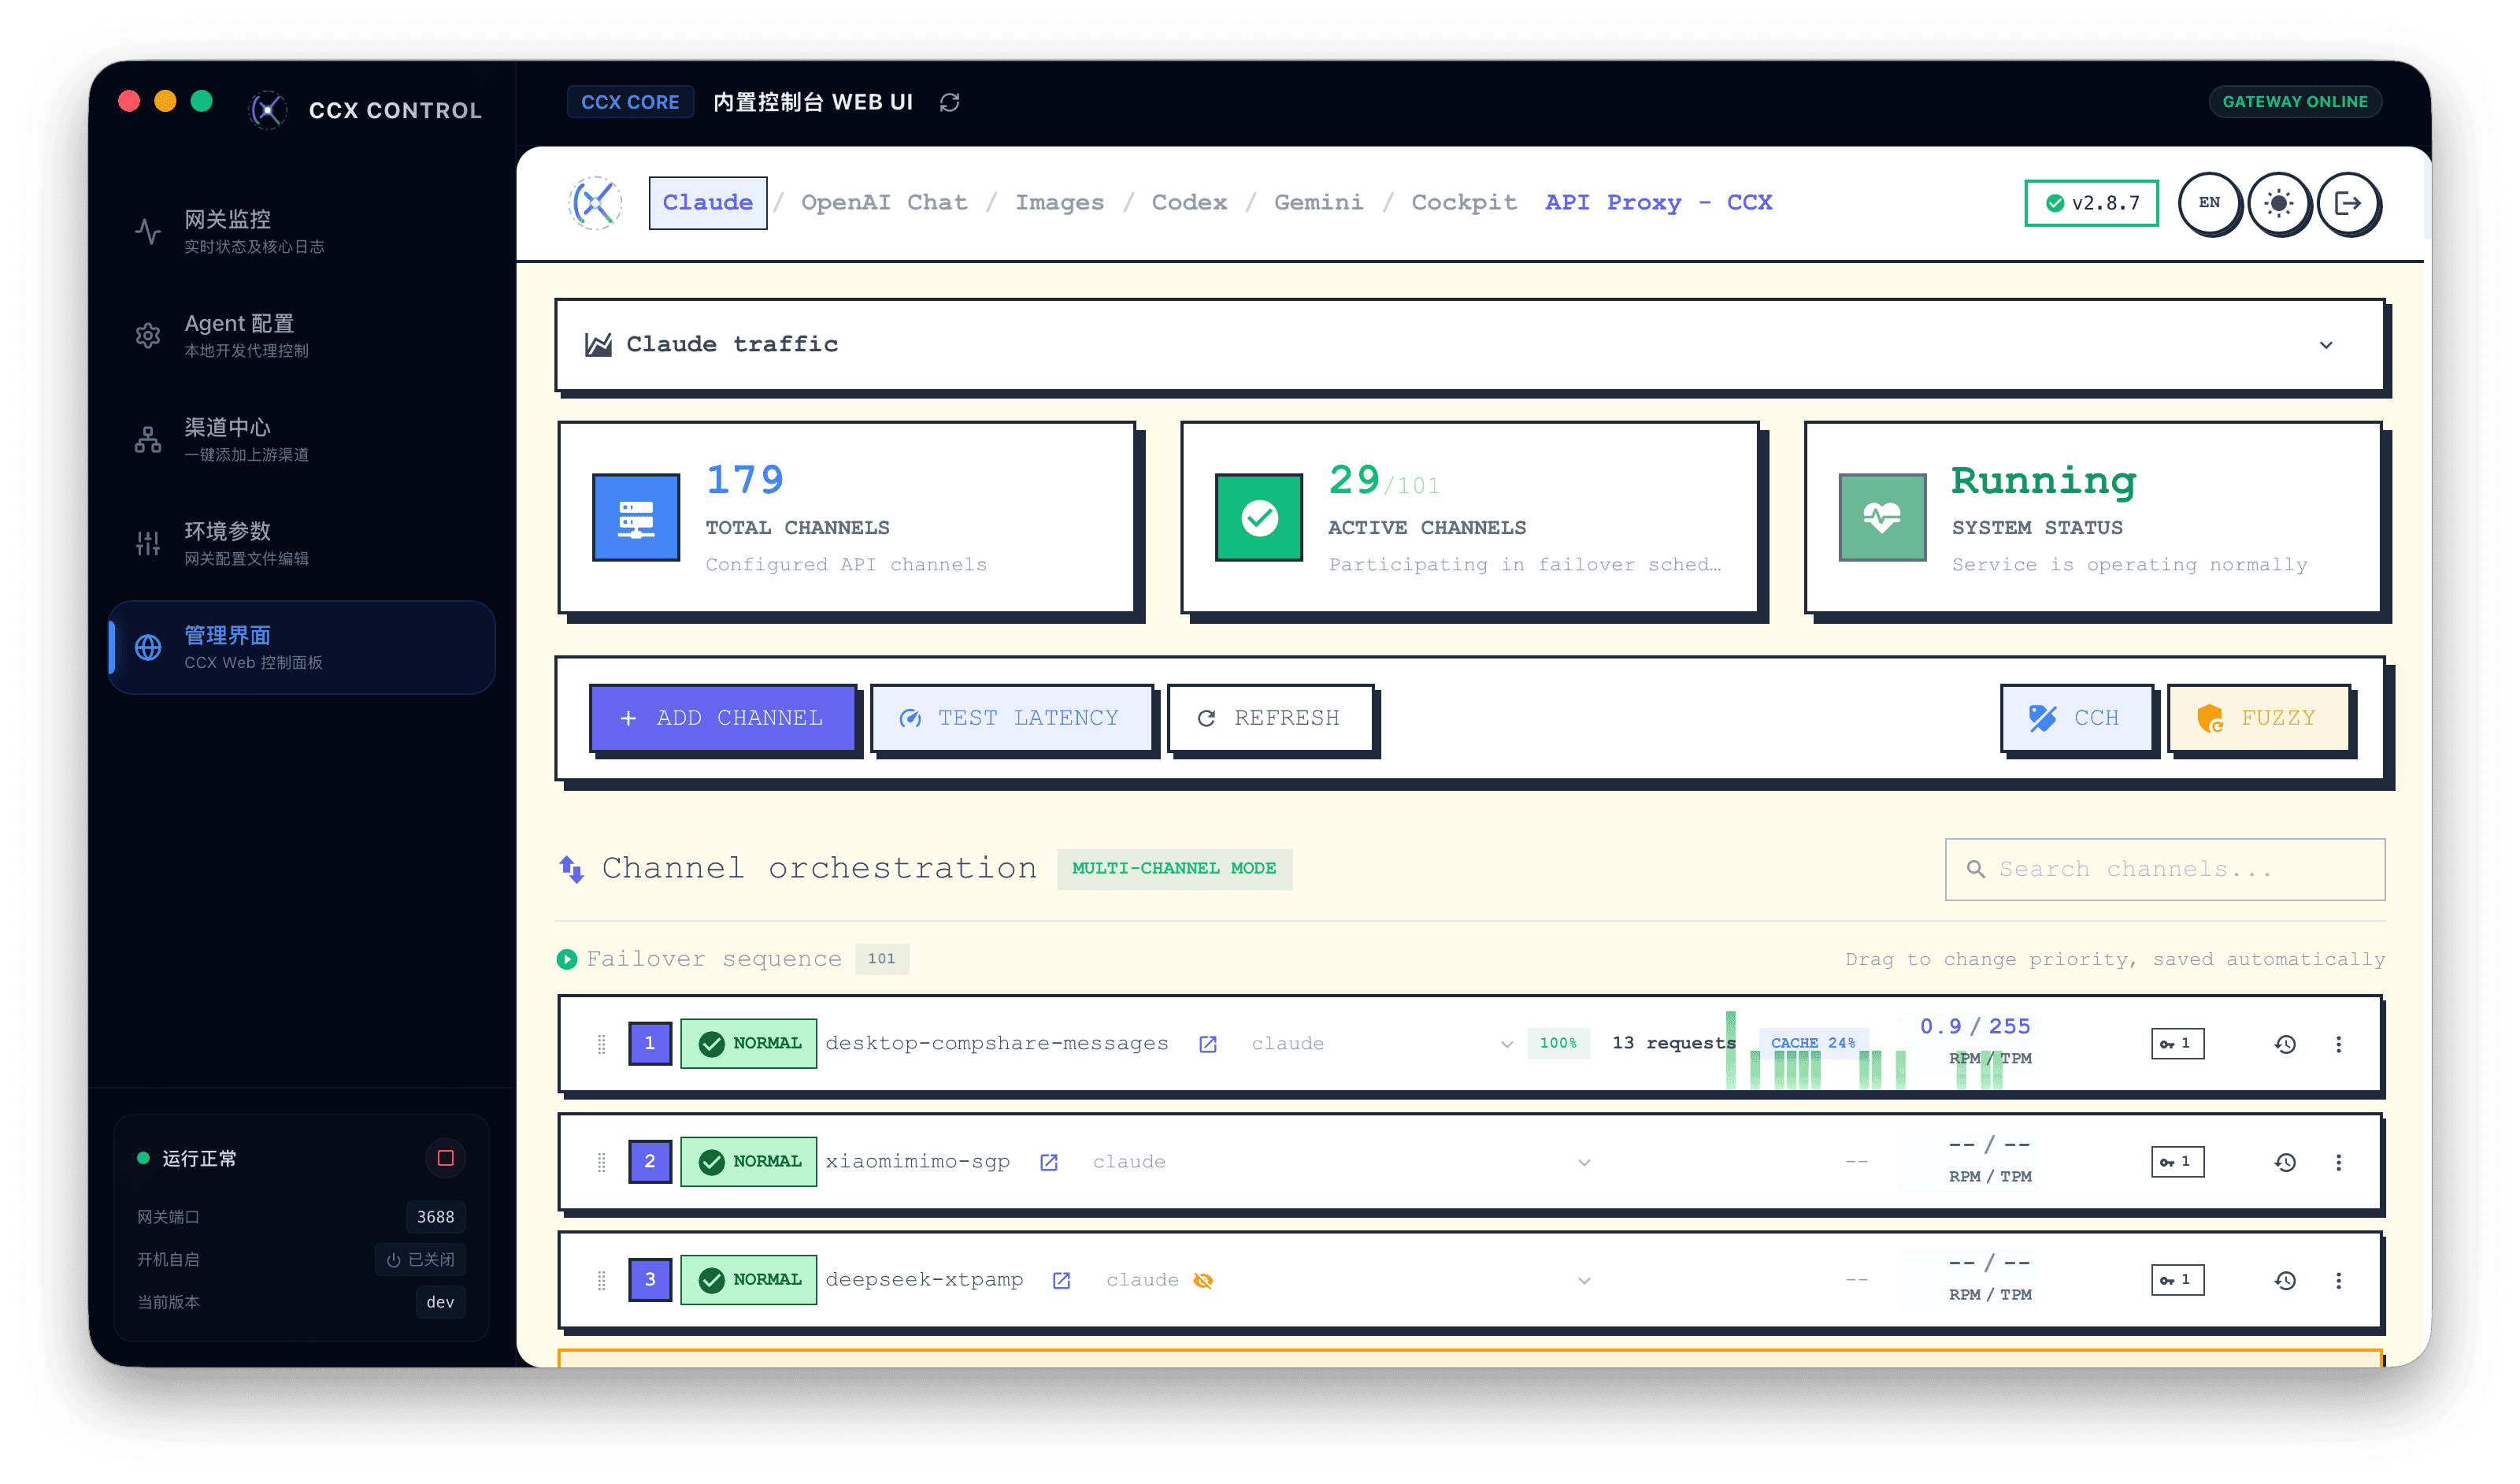
You can open the embedded web UI from Gateway Monitor to manage channels, inspect logs, and verify service status.
System tray
After the window is closed, CCX Desktop minimizes to the system tray.
Common tray actions:
- View service status, port, and PID
- Start / stop / restart service
- Open web UI
- Copy web UI address and
PROXY_ACCESS_KEY - Launch-at-login toggle
- Check for updates
Auto update
The GitHub installer build supports in-app auto updates:
- One automatic check 5 seconds after launch
- Additional checks every 30 minutes
- Manual check by clicking the version number in the sidebar
The Microsoft Store build does not use the GitHub updater. The sidebar and tray indicate that updates are handled by the Store.
GitHub update flow:
- A new version is detected and the update dialog appears
- The update package is downloaded
- SHA256 verification runs
- macOS: open the DMG and replace the app manually
- Windows: the installer launches automatically
- Linux (AppImage): the app is replaced and restarted
First-run checklist
Your desktop setup is ready when all of these are true:
- [ ]
PROXY_ACCESS_KEYhas been generated and copied - [ ] The gateway is running and the Gateway Monitor status looks healthy
- [ ] At least one target channel has been added and enabled
- [ ] Agent configuration has been applied and the client has been restarted
- [ ] A client request appears in the CCX Desktop logs
For startup failures, update issues, or agent configuration problems, see Troubleshooting.